Automated rollbacks
Recover from failed deployments fast. Microtica reverts to the last stable version automatically when a release fails, with no setup required on any pipeline.
Automated rollbacks revert your deployment to the last stable version when a release fails or runs into trouble. They give you a fast, reliable way to recover and keep your environments working.
Prerequisites
- A Microtica account.
- A Git account (GitHub, Bitbucket, GitLab, or CodeCommit).
- An AWS account connected to Microtica with the right permissions.
- A Microtica project with a deployment pipeline set up.
Enable automated rollbacks
Automated rollbacks are available to all users with no setup required.
How rollbacks work
Because rollbacks are enabled on every pipeline, using them during production deployments is straightforward:
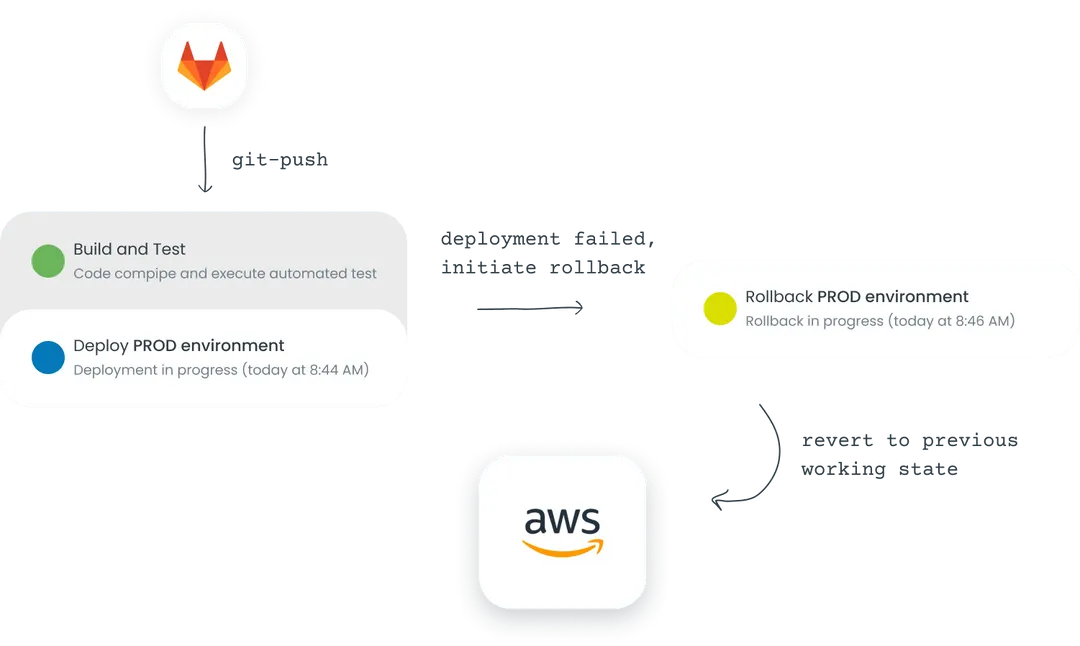
- Start a deployment. Trigger a deployment with your pipeline, either by hand from the console or with a git push to the configured branch. Microtica runs the deployment steps: building, testing, and deploying your code changes to the environment.
- Monitor the deployment. Watch the pipeline's progress and the health of the deployed infrastructure. Microtica gives you real-time visibility into the deployment status, logs, and metrics.
- Detect an issue. If a critical issue or failure occurs during the deployment, Microtica's monitoring identifies the problem and triggers an automated rollback.
- Roll back. Microtica reverts the deployment to a previous stable version, restoring the production or non-production environment to a working state.
- Verify and troubleshoot. Confirm the infrastructure works correctly in the restored state, then troubleshoot to find the root cause of the issue.
With these steps, you can use automated rollbacks to recover from failed deployments and keep your production environments stable, minimizing downtime and the impact of issues on your applications.
Next steps
Deployment insights
See the full history of every deployment, track performance metrics, trace changes back to Git commits, and roll back to a previous version when you need to.
Templates
Provision AWS infrastructure and deploy apps in minutes with Microtica's pre-built templates, built by certified AWS architects for security and scale.