Deploy a Next.js app
Deploy a production-ready Next.js app on your own AWS account with Microtica's free template — start on a demo cluster, then self-host on EKS.
Next.js is an open-source React framework for building web applications, with everything you need for production: hybrid static and server rendering, TypeScript support, smart bundling, route pre-fetching, and more.
Microtica's ready-to-use Next.js template is part of the Free templates pack. Deploy your app on the demo Kubernetes cluster to get started, then self-host Next.js on your own AWS account for a production-ready setup in minutes.
One-click deploy
Click Deploy with Microtica below and follow the template steps to deploy your Next.js application on your AWS account.

1. Create an account
Creating a Microtica account is free. Sign up with your email or with your Git account.
2. Select the Next.js template

On the left, you'll find a link to this template's source code, which opens Microtica's GitHub account.
3. Create a Git repository
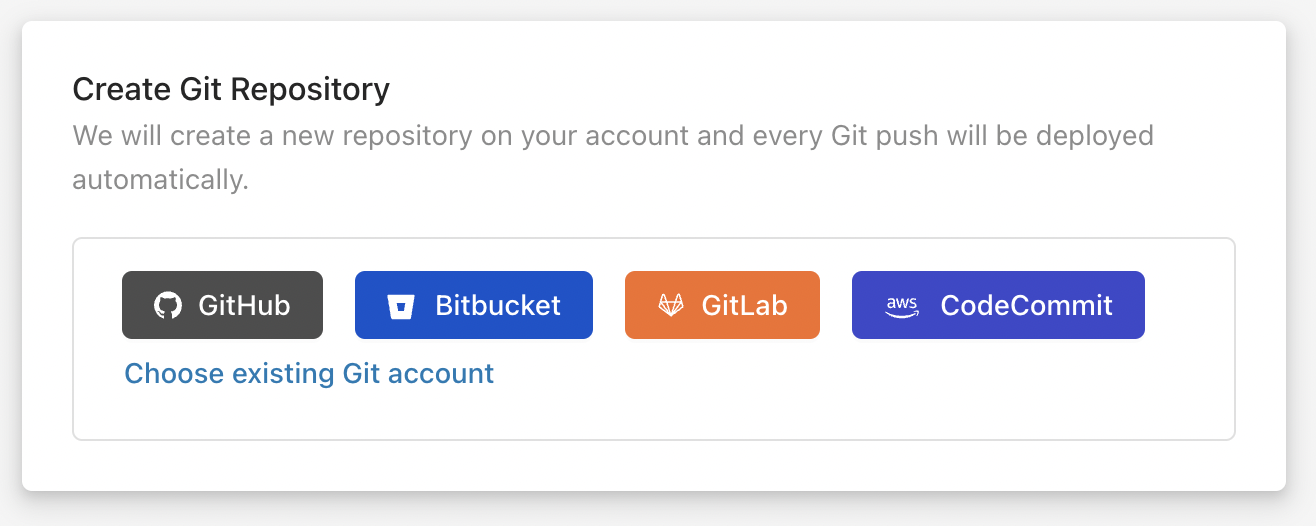
First, connect a Git account (GitHub, Bitbucket, GitLab, or CodeCommit). Microtica sets a default repository name for each template, but you can change it. If you already have a Git account connected, choose it from the list. Microtica creates a new repository on your account with the name you provide, and deploys every Git push automatically.
Already have a Node.js application? Follow the guide on how to import an existing application in Microtica.
4. Configure the template
After creating your repository, enter a name for the application so you can tell it apart from other apps in the Applications tab.

Customize the template to your needs with environment variables. You can update the configuration later in App Settings.
5. Select a cluster
Next, choose the Kubernetes cluster where your application will deploy. You have two options for running your container app:
- Create a new EKS cluster on the spot
- Connect an existing cluster

5.1. Create a new EKS cluster on the spot
To deploy your Next.js application on your own AWS account, create an AWS-managed Kubernetes (EKS) cluster by clicking Create Amazon EKS Cluster.
This is the recommended option for production applications — it gives you full ownership of your cloud infrastructure and applications.
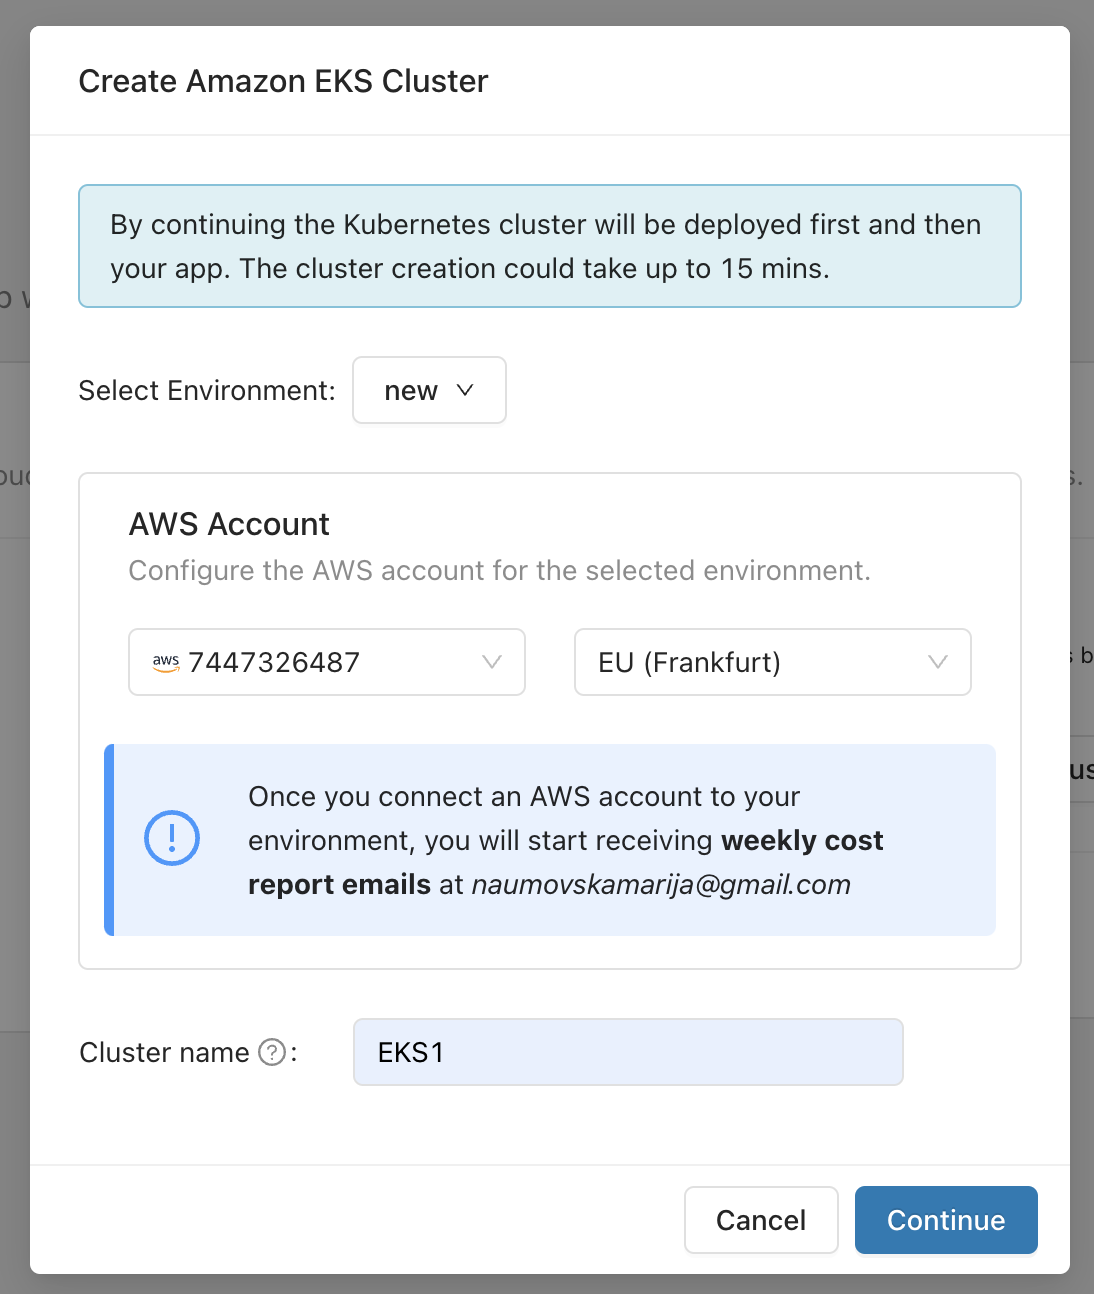
This action opens the popup shown above. Select the environment where you want this cluster deployed. If you don't have one, create it by selecting Create Environment from the dropdown menu.
Once you select an environment, choose the AWS account and region where the EKS cluster will deploy. If you don't have a connected AWS account, connect one here by clicking the Connect AWS Account button. This starts a CloudFormation stack that grants Microtica permission to provision infrastructure on your AWS account. When the stack is created, the connection is established automatically and the account appears in the dropdown list.
Select the account and region, then click Continue to move to the deployment of your environment.
Deploying a new Kubernetes cluster on your AWS account can take up to 15 minutes.
5.2. Connect an existing cluster
You can also connect an existing Kubernetes cluster and deploy your applications there. Microtica connects to clusters running on practically any cloud provider or on-premise, giving you the full capabilities of Microtica's Kubernetes automation.
To connect an existing cluster and deploy your Node.js application there, follow the guide below.
6. Deploy the template to your cluster
After selecting the cluster, you'll see a summary of the previous steps and what this template will deploy.
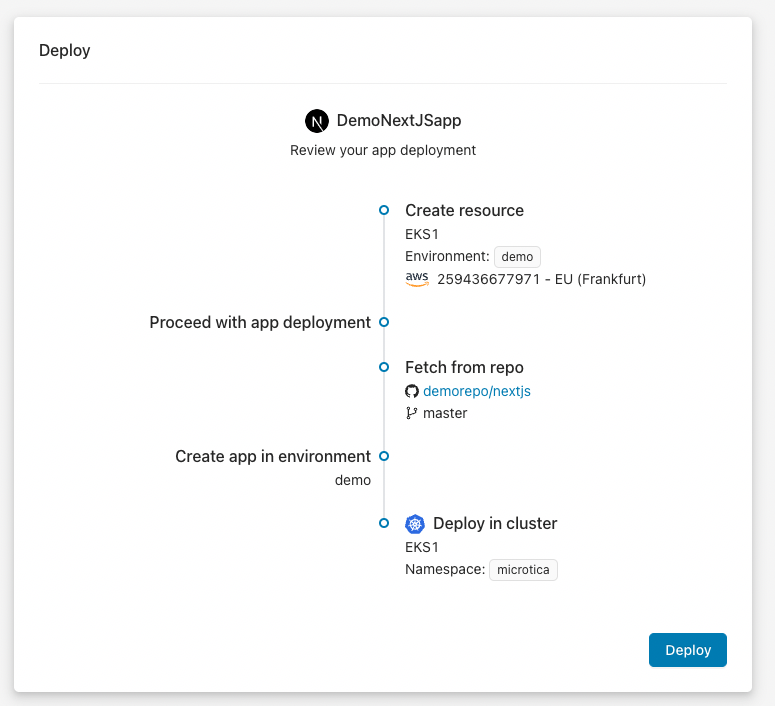
Trigger a deployment of the environment by clicking the Deploy button.
It takes about 4-5 minutes (15-20 with EKS) to deploy this application to the cloud.
In the meantime, follow the detailed deployment logs by clicking View deployment if you're deploying an EKS cluster on your AWS account.

When the EKS cluster deployment finishes — or if you're deploying on the shared Kubernetes cluster — click View logs to follow the application deployment.

7. Access the application
When the deployment finishes, click View Application to open the app's Overview tab. Here you can Assign a domain to your application so you can reach it. Use a free Microtica-assigned domain, or set up your own custom domain. Follow the steps to expose your Next.js app on the internet.

For more detail, check the Deployments and Monitoring tabs, where you'll find the pipeline history, resource consumption metrics, and logs for your instances.
To scale your Next.js application, read about scaling applications in Microtica.
Optimize AWS cost
To save costs while running Next.js in a non-production environment, run it Monday to Friday, 8 hours per day. This schedule can cut your cloud expenses by at least 65%.
In the Resources or Cost Dashboard, create a Saving Schedule to apply these savings.

Next steps
Import an existing Node.js application
Connect your Git repository and deploy your existing Node.js backend on your own AWS account with Microtica's automated CI/CD and Kubernetes setup.
Amazon EKS
Create a managed Kubernetes (EKS) cluster on your own AWS account with Microtica's production-ready template, configured and deployed in about 10 minutes.