Set up automated deployments
Deploy automatically on every commit or tag. Connect a Git repository to a cloud environment and let Microtica run your CI/CD pipeline on each push.
Microtica triggers your CI/CD pipeline automatically when you push code to a Git repository. You pick the branch or tag to deploy from, connect the repository to a cloud environment, and Microtica runs the deployment on every change.
Prerequisites
- A Microtica account.
- A Git repository with your application code.
- Access to the cloud environment where you want to deploy (AWS).
Step 1: Enable automated deployments in the UI
- Log in to Microtica and open the Environment where your app is deployed.
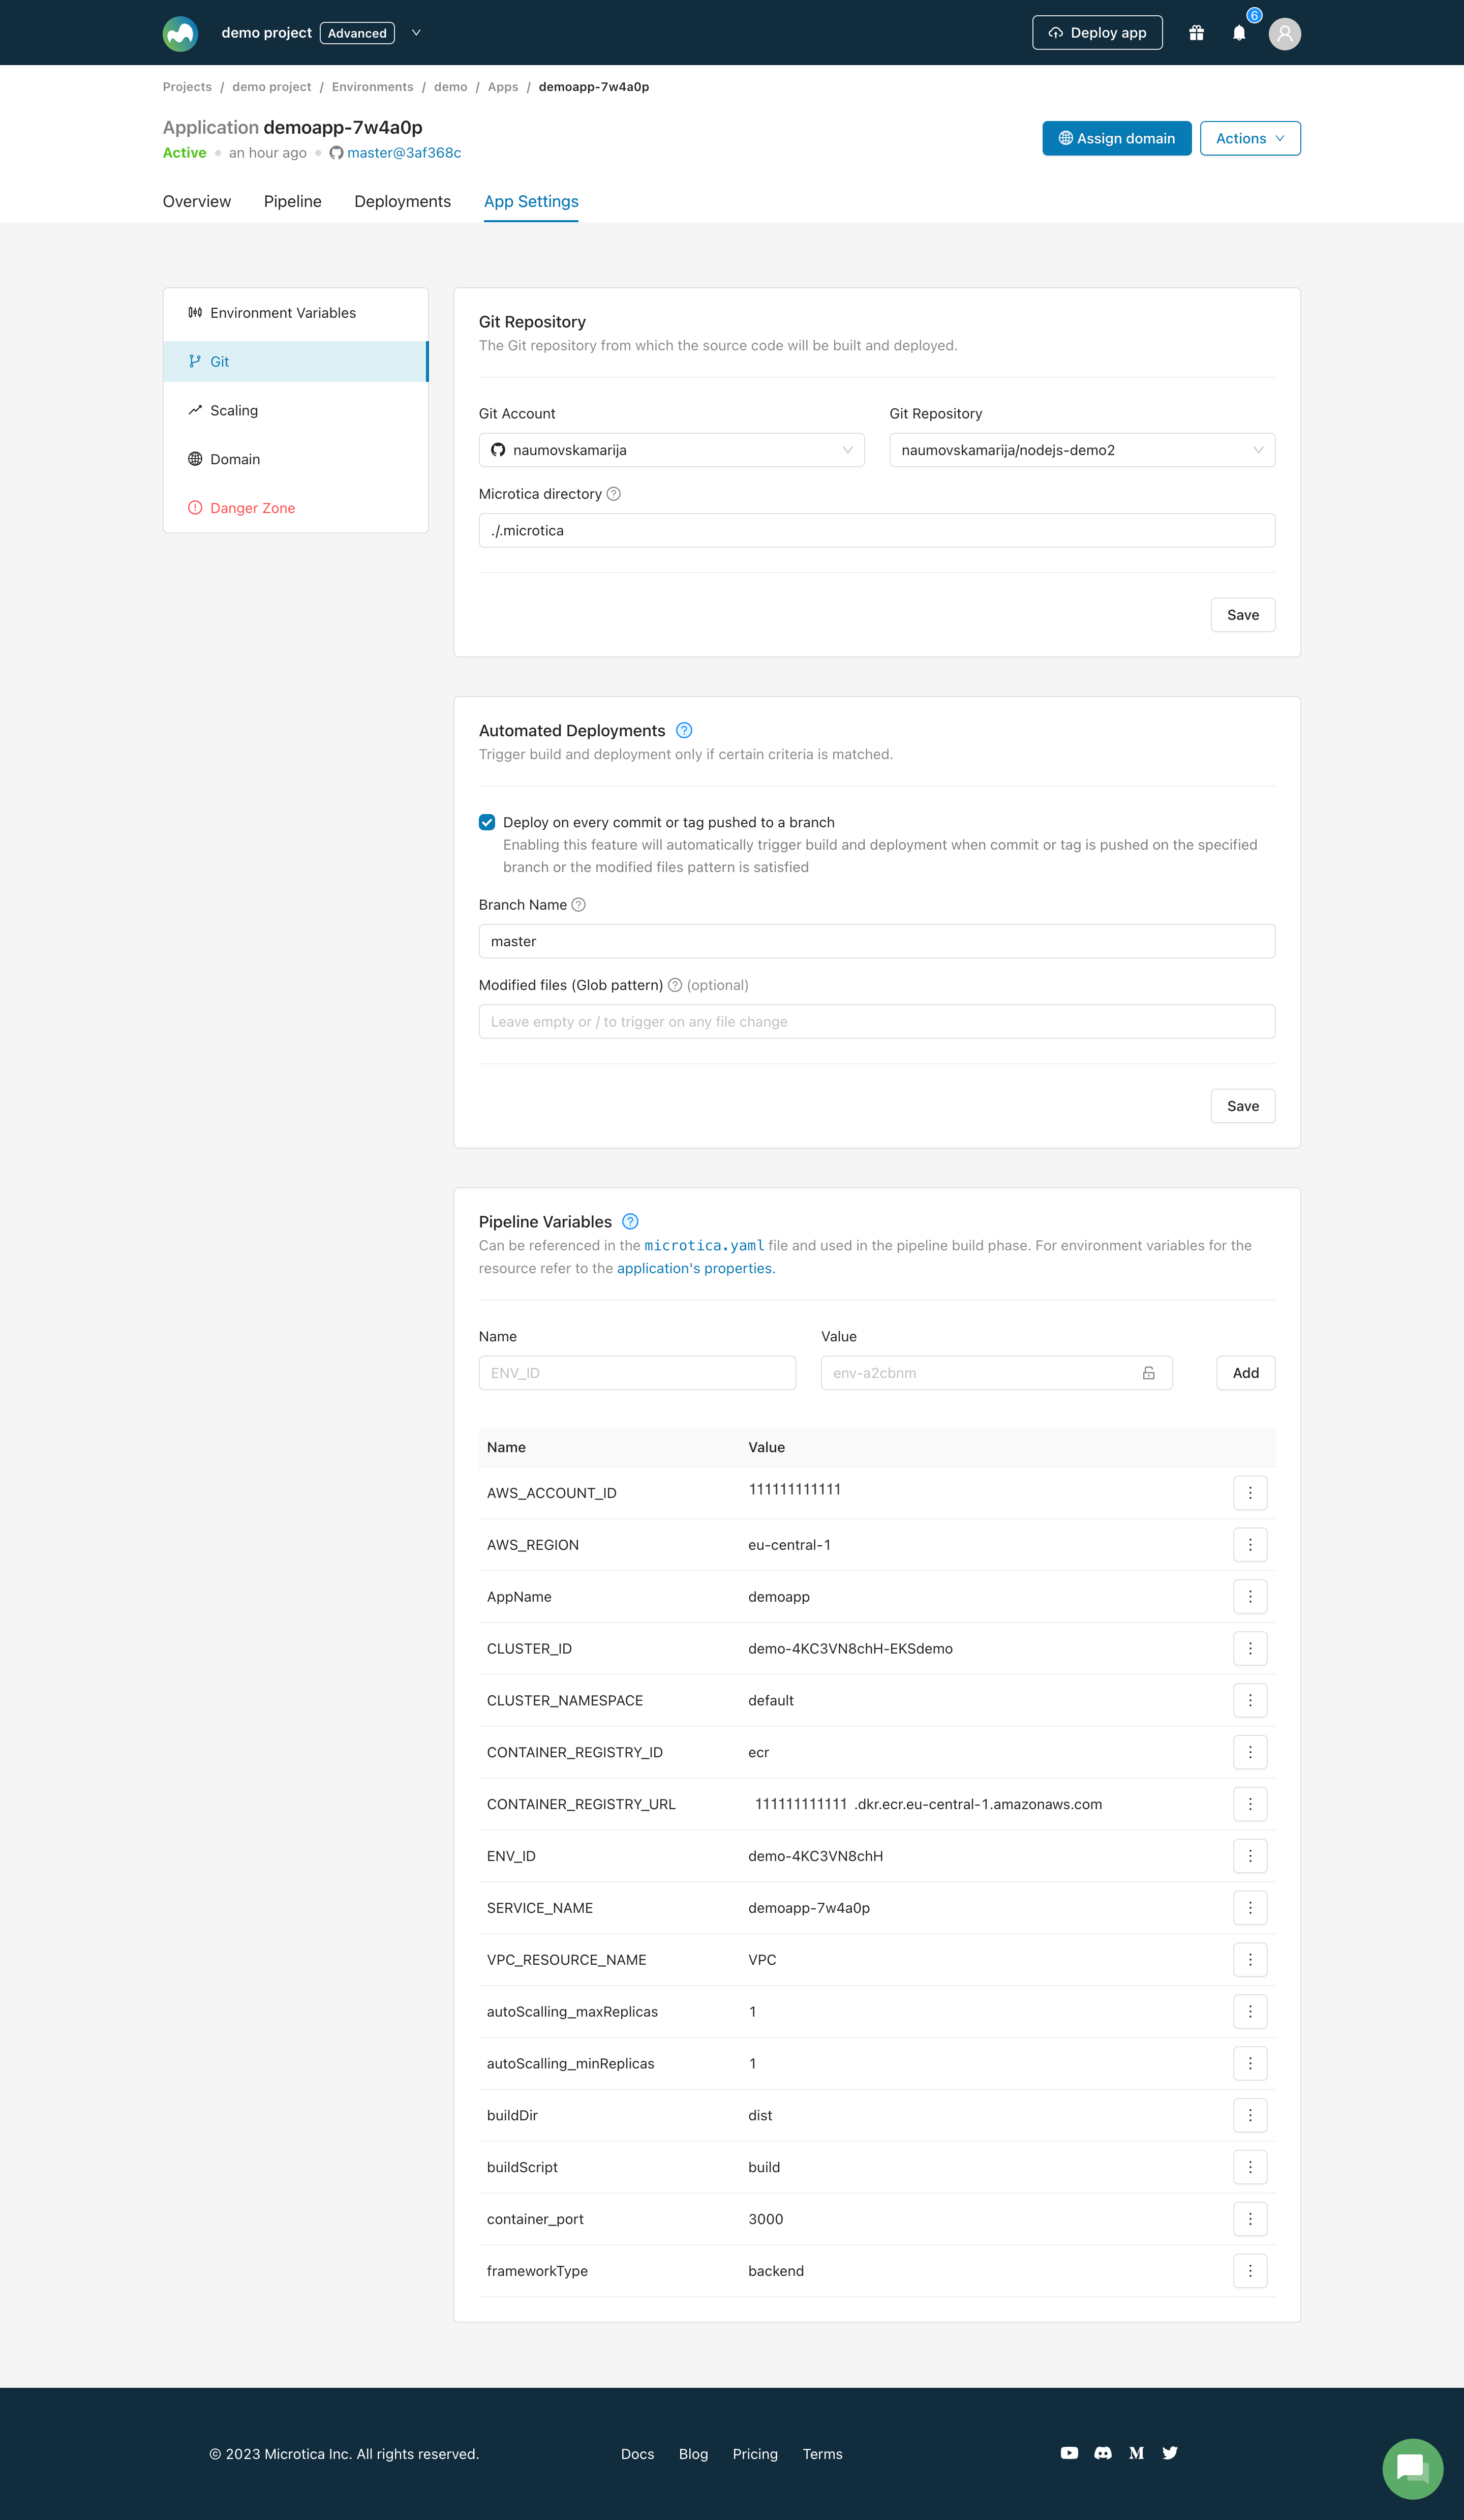
- In the Apps tab, select your application and open App Settings.
- Click Git in the left panel to review your Git settings: repository, branch/tag setup, and pipeline variables.
- Check Deploy on every commit or tag pushed to a branch to enable the automated trigger.
- Click Save in the top-right corner.
Step 2: Define the deployment pipeline
You define your deployment pipeline in the microtica.yaml file. This file is the blueprint for your delivery process, specifying the build, test, and deployment steps for your application.
For a full guide to configuring the deployment, see the Deploy Application step, which includes detailed explanations and examples.
Step 3: Save and activate the pipeline
- Review the pipeline configuration and confirm every setting in
microtica.yamlis correct. - Commit and push your changes to the configured branch or tag in the selected Git repository.
- This activates the pipeline and runs the defined steps.
Step 4: Monitor the deployment
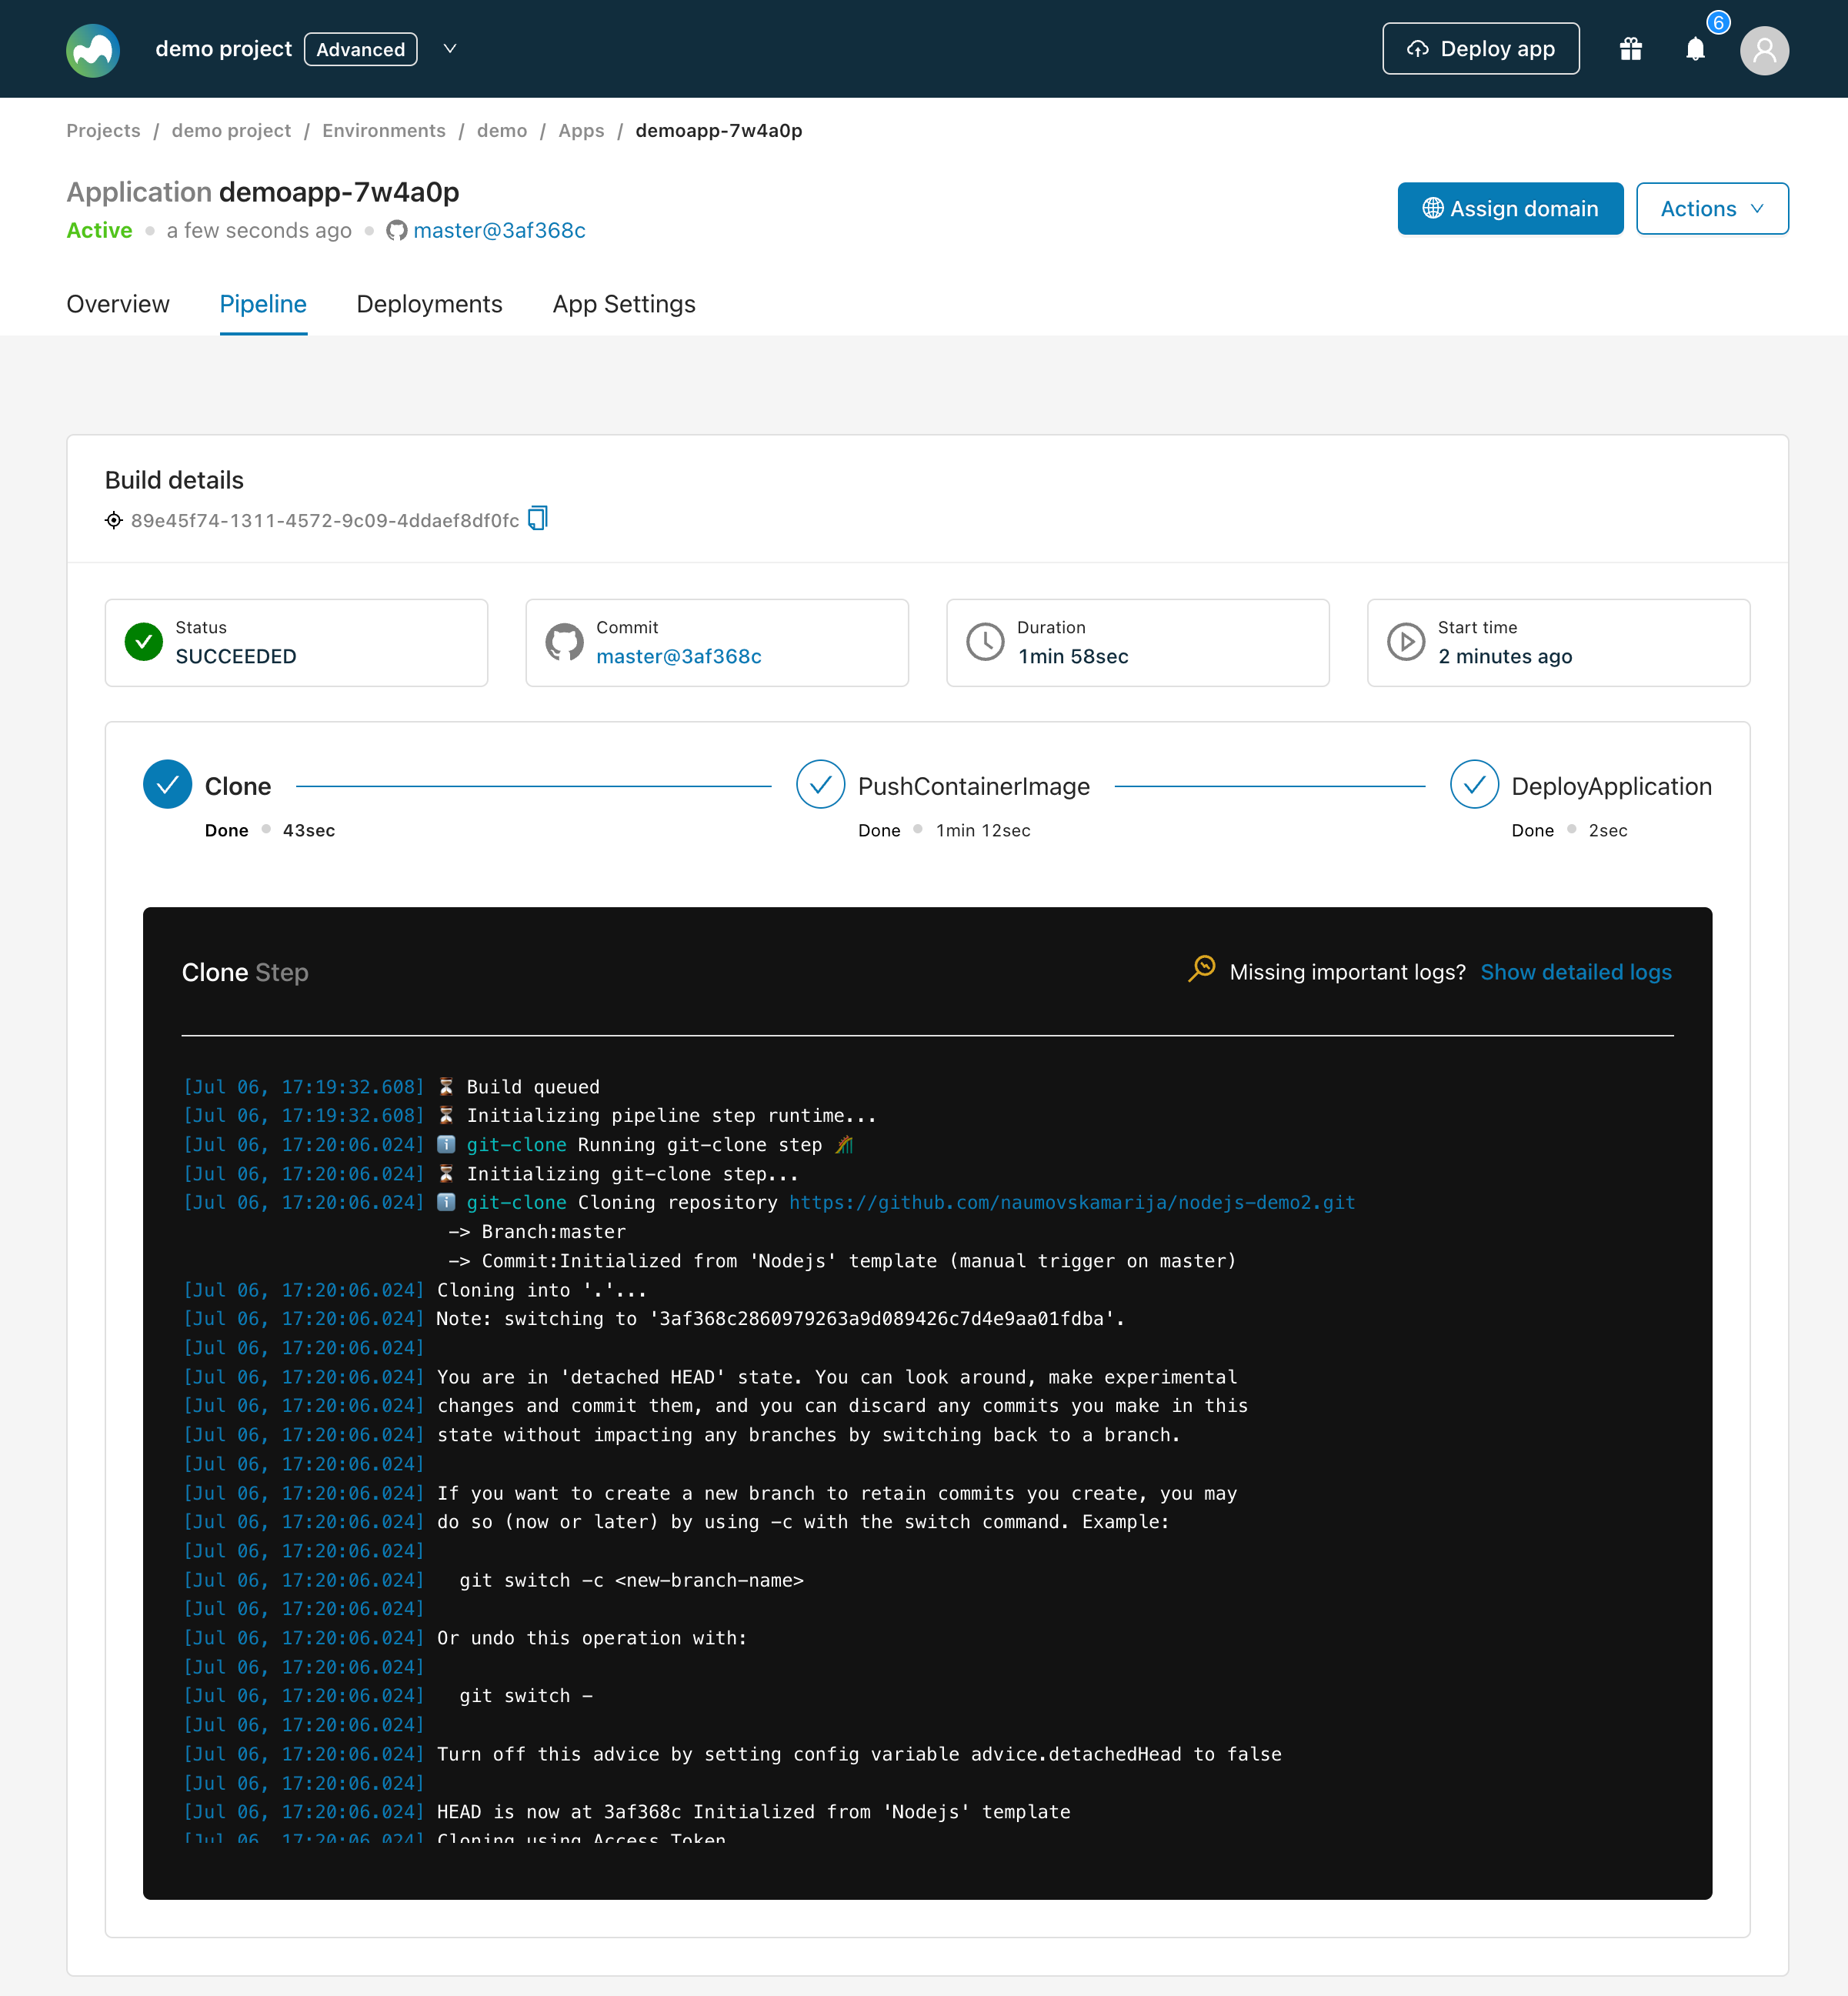
- Open the Pipeline tab in the application view.
- Click the pipeline you created to track its progress.
- You receive in-app notifications and updates on the deployment status as it moves through the pipeline stages.
Video guide
Watch a scenario that deploys automatically from the master branch and another feature branch.
Automated deployments are now set up. Whenever you push code to the configured branch or tag, Microtica triggers the CI/CD pipeline and deploys to your cloud environment.
Take it further. Microtica offers more configuration options for automated deployments, including environment-specific variables and integrations with external tools. See the rest of this section to optimize your deployments.
Next steps
Deploy manually from the UI
Trigger a deployment by hand from the Microtica console, pick the branch to deploy, and follow the pipeline logs in real time as your app ships.
Deploy from multiple Git branches
Run separate deployment pipelines for different Git branches so you can ship development, testing, and production to their own cloud environments in parallel.