Connect an existing Kubernetes cluster
Connect a Kubernetes cluster running on any cloud provider or on-premise to Microtica, and deploy to it with the full Kubernetes automation you already use.
Connect a Kubernetes cluster you already run and deploy your applications to it. You can connect clusters running on almost any cloud provider or on-premise, and use the full capabilities of Microtica's Kubernetes automation.
Same experience, either way
You get the same features and the same user experience whether you create a new Kubernetes setup with Microtica or connect an existing cluster.
Prerequisites
If your cluster is behind a firewall, allow inbound access from this IP address:
- 35.157.106.197
Start connecting the cluster
In the Microtica console, click Create New Cluster and select the Connect Existing Cluster option.
Create the service account and role binding
Apply the following manifest to your cluster. It creates a microtica service account, a token secret, and a cluster role binding that grants Microtica admin access.
apiVersion: v1
kind: ServiceAccount
metadata:
name: microtica
secrets:
- name: microtica-secret
---
apiVersion: v1
kind: Secret
metadata:
name: microtica-secret
annotations:
  kubernetes.io/service-account.name: microtica
type: kubernetes.io/service-account-token
---
apiVersion: rbac.authorization.k8s.io/v1
kind: ClusterRole
metadata:
name: microtica-admin
rules:
- apiGroups: ["*"]
  resources: ["*"]
  verbs: ["*"]
---
apiVersion: rbac.authorization.k8s.io/v1
kind: ClusterRoleBinding
metadata:
name: microtica-rbac
subjects:
- kind: ServiceAccount
  namespace: microtica
  name: microtica
roleRef:
kind: ClusterRole
name: microtica-admin
apiGroup: rbac.authorization.k8s.io
Get the service account token
Run the following command to print the service account token:
kubectl describe secrets/microtica-secret --namespace microtica | sed -n 's/.*token://p' | tr -d '[:space:]'Connect the cluster in Microtica
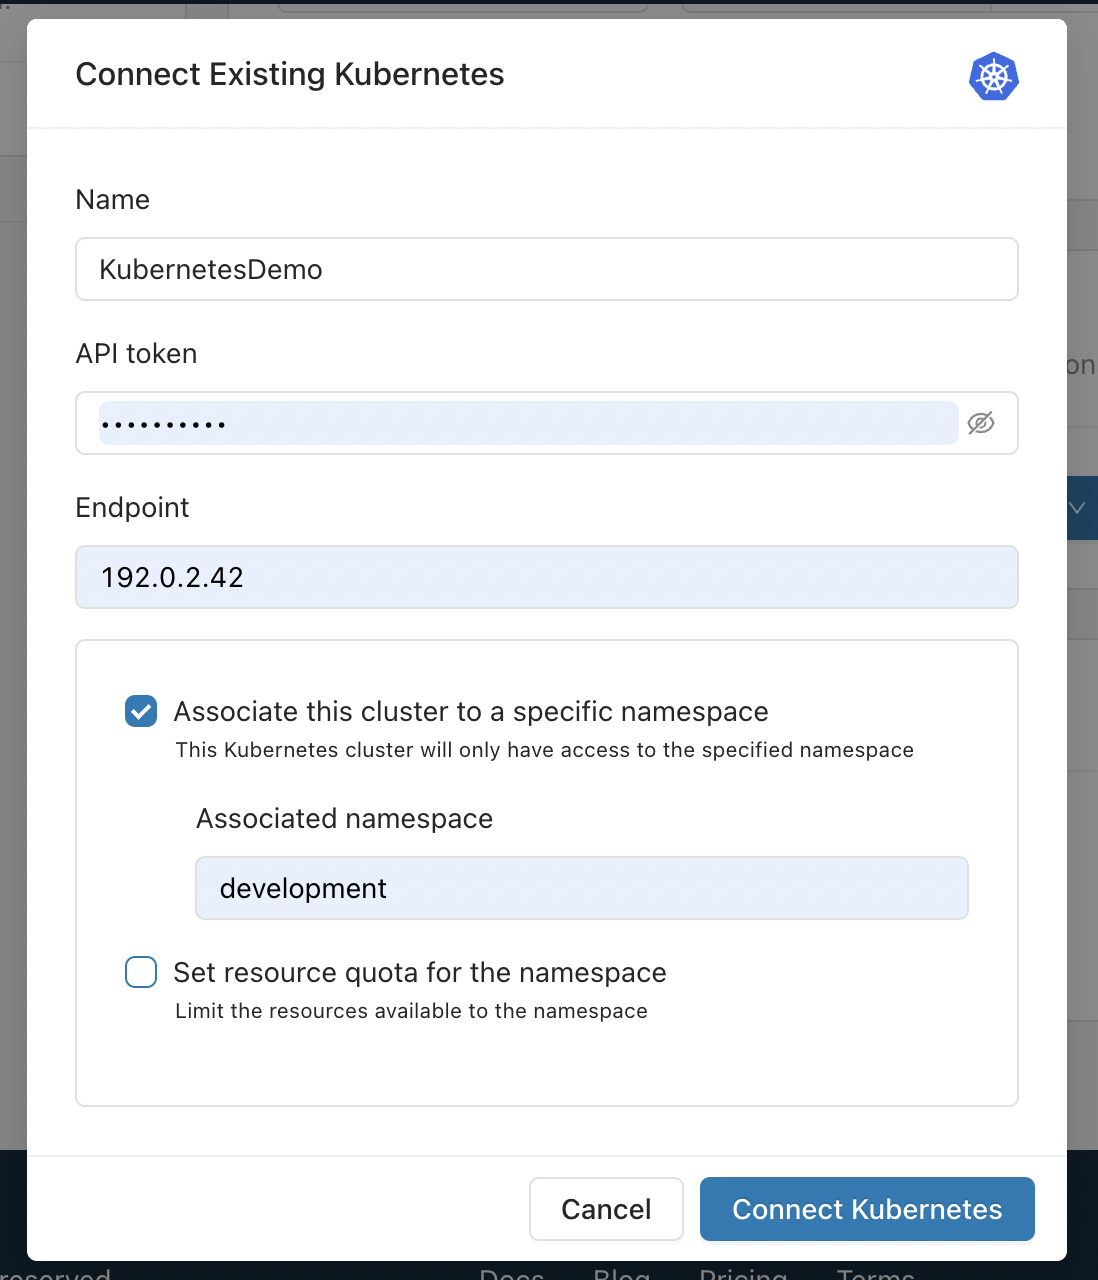
Back in the Connect Existing Kubernetes dialog, enter:
- Name — a friendly name for the cluster.
- API token — the token you printed in the previous step.
- Endpoint — your cluster's API server endpoint.
Optionally, select Associate this cluster to a specific namespace to limit Microtica to a single namespace, and Set resource quota for the namespace to cap the resources it can use. Then click Connect Kubernetes.
Next steps
Connect an Exoscale account
Connect your Exoscale account to Microtica so it can provision and manage infrastructure for you, authenticating with an API key and secret you create.
Connect a container registry
Connect your own Docker registry to Microtica to store images built in pipelines and deploy them to Kubernetes. Supports DockerHub, Amazon ECR, and GitLab.