Connect an AWS account
Connect your AWS account to Microtica so it can provision and manage infrastructure for you, using short-lived AWS STS credentials instead of stored keys.
Microtica provisions infrastructure directly on your own AWS account. Before it can create or manage anything, you connect the account once and grant Microtica permission to act on it.
Microtica never stores long-lived keys. It authenticates through the AWS Security Token Service (STS) AssumeRole action to generate temporary credentials, then uses those for every call to your account.
Prerequisites
- A Microtica project — create one if you don't have it yet.
- Permission to create a CloudFormation stack in the AWS account you want to connect.
Connect your AWS account
-
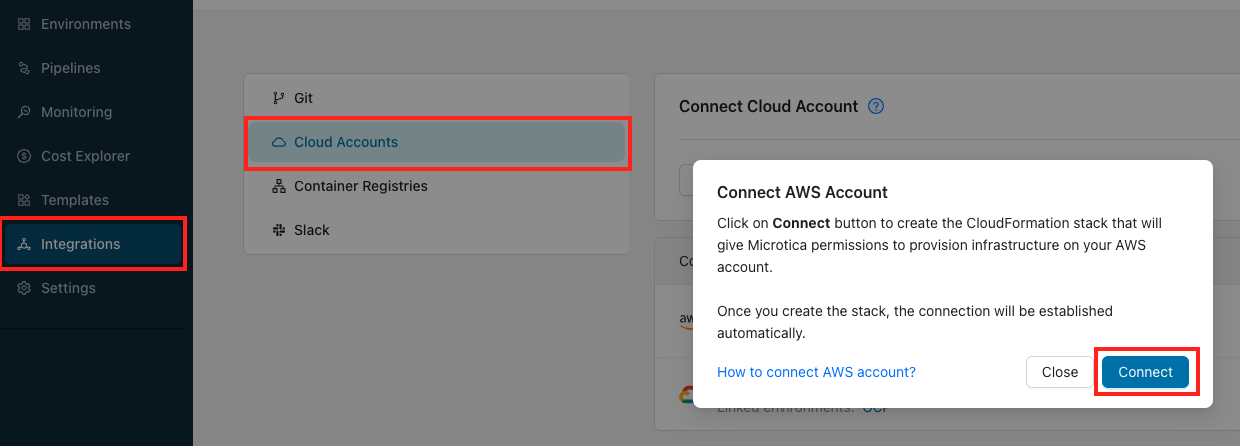
In your project, open Integrations and select the Cloud Accounts tab.
-
Click Connect AWS Account.
-
In the modal, click Connect. Microtica redirects you to the AWS CloudFormation console.
-
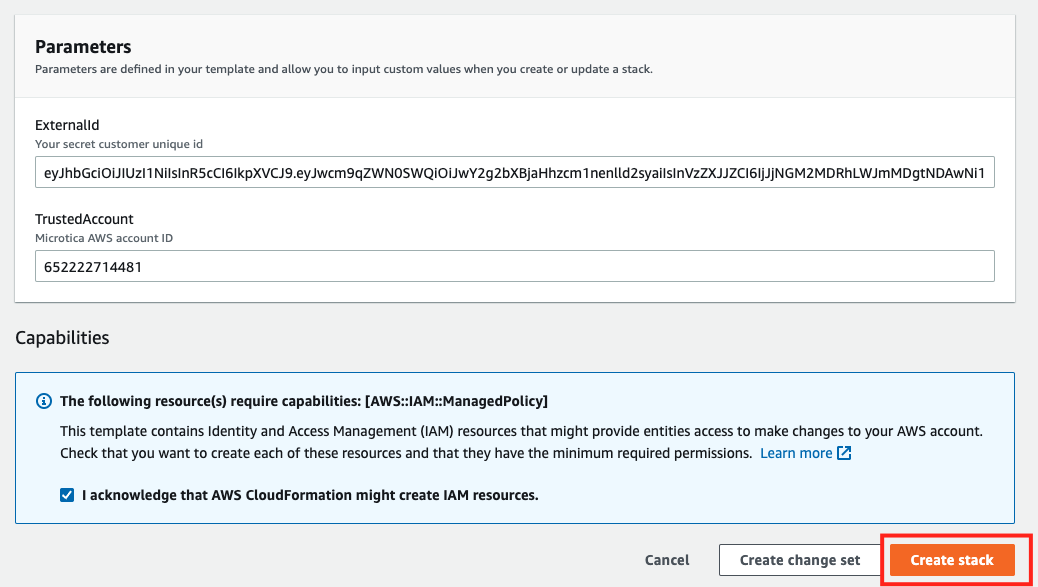
Tick the checkbox to acknowledge the required capabilities, then click Create stack.
When the stack finishes creating, your AWS account appears automatically in the Microtica console.
Revoke access
To remove Microtica's access, delete the CloudFormation stack you created during setup. Microtica loses all access to the account the moment the stack is gone.
Next steps
Integrations
Connect the cloud providers, components, frameworks, databases, and tools you already use, and build, deploy, and scale them from one platform with Microtica.
Connect a GCP account
Connect your Google Cloud account to Microtica so it can provision and manage infrastructure for you by impersonating a service account you create.