Deploy your first application
Deploy frontend and backend apps like Next.js, ReactJS, Vue.js, and Strapi to Kubernetes with Microtica's ready-to-use application templates in three steps.
Microtica ships with ready-to-use application templates so you can deploy fast. The templates cover popular frontend and backend frameworks, including:
You deploy these applications on Kubernetes — either provision a new cluster through Microtica or connect an existing one, on any cloud provider or on-premise.
Here's a short video that walks you through deploying an application on Kubernetes with Microtica.
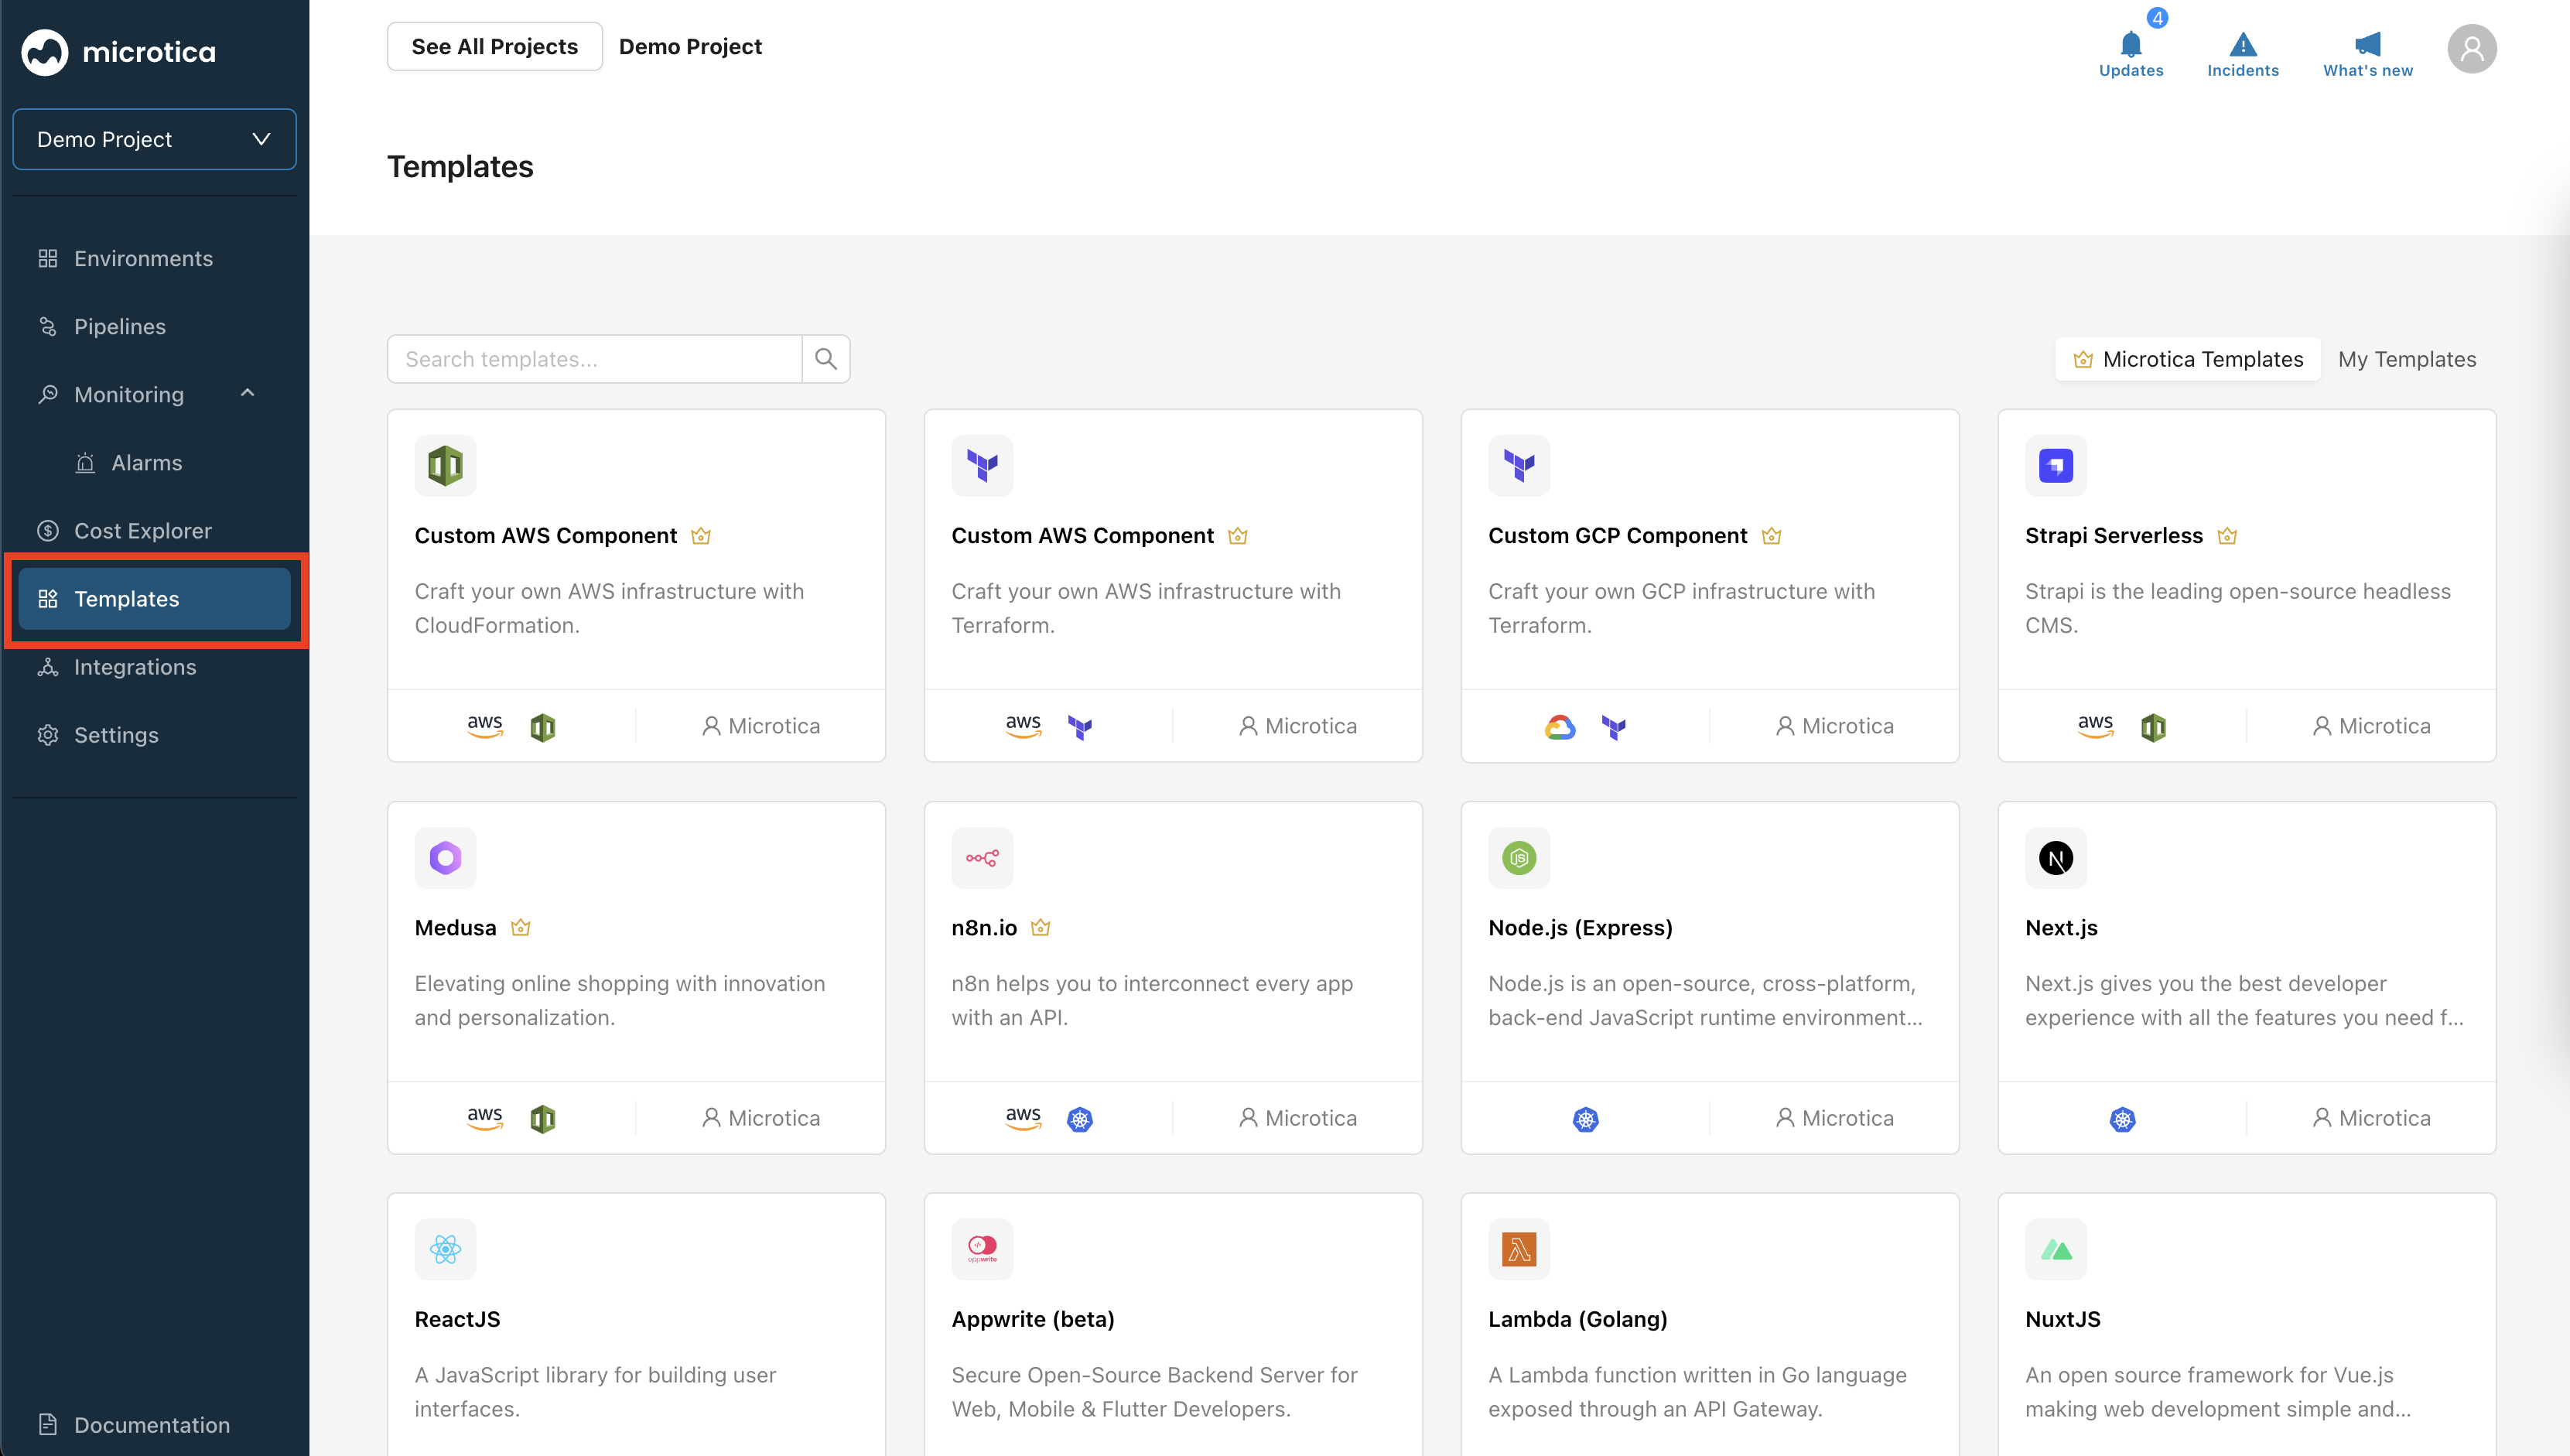
Create an application from a template
Pick any template from the list and follow the guide. It takes three steps to deploy an application to the cloud.
1. Create or import a Git repository
Connect your GitHub, BitBucket, or GitLab account to Microtica. Create a new repository for your application or import an existing one. This repository holds your application's code and manages version control.

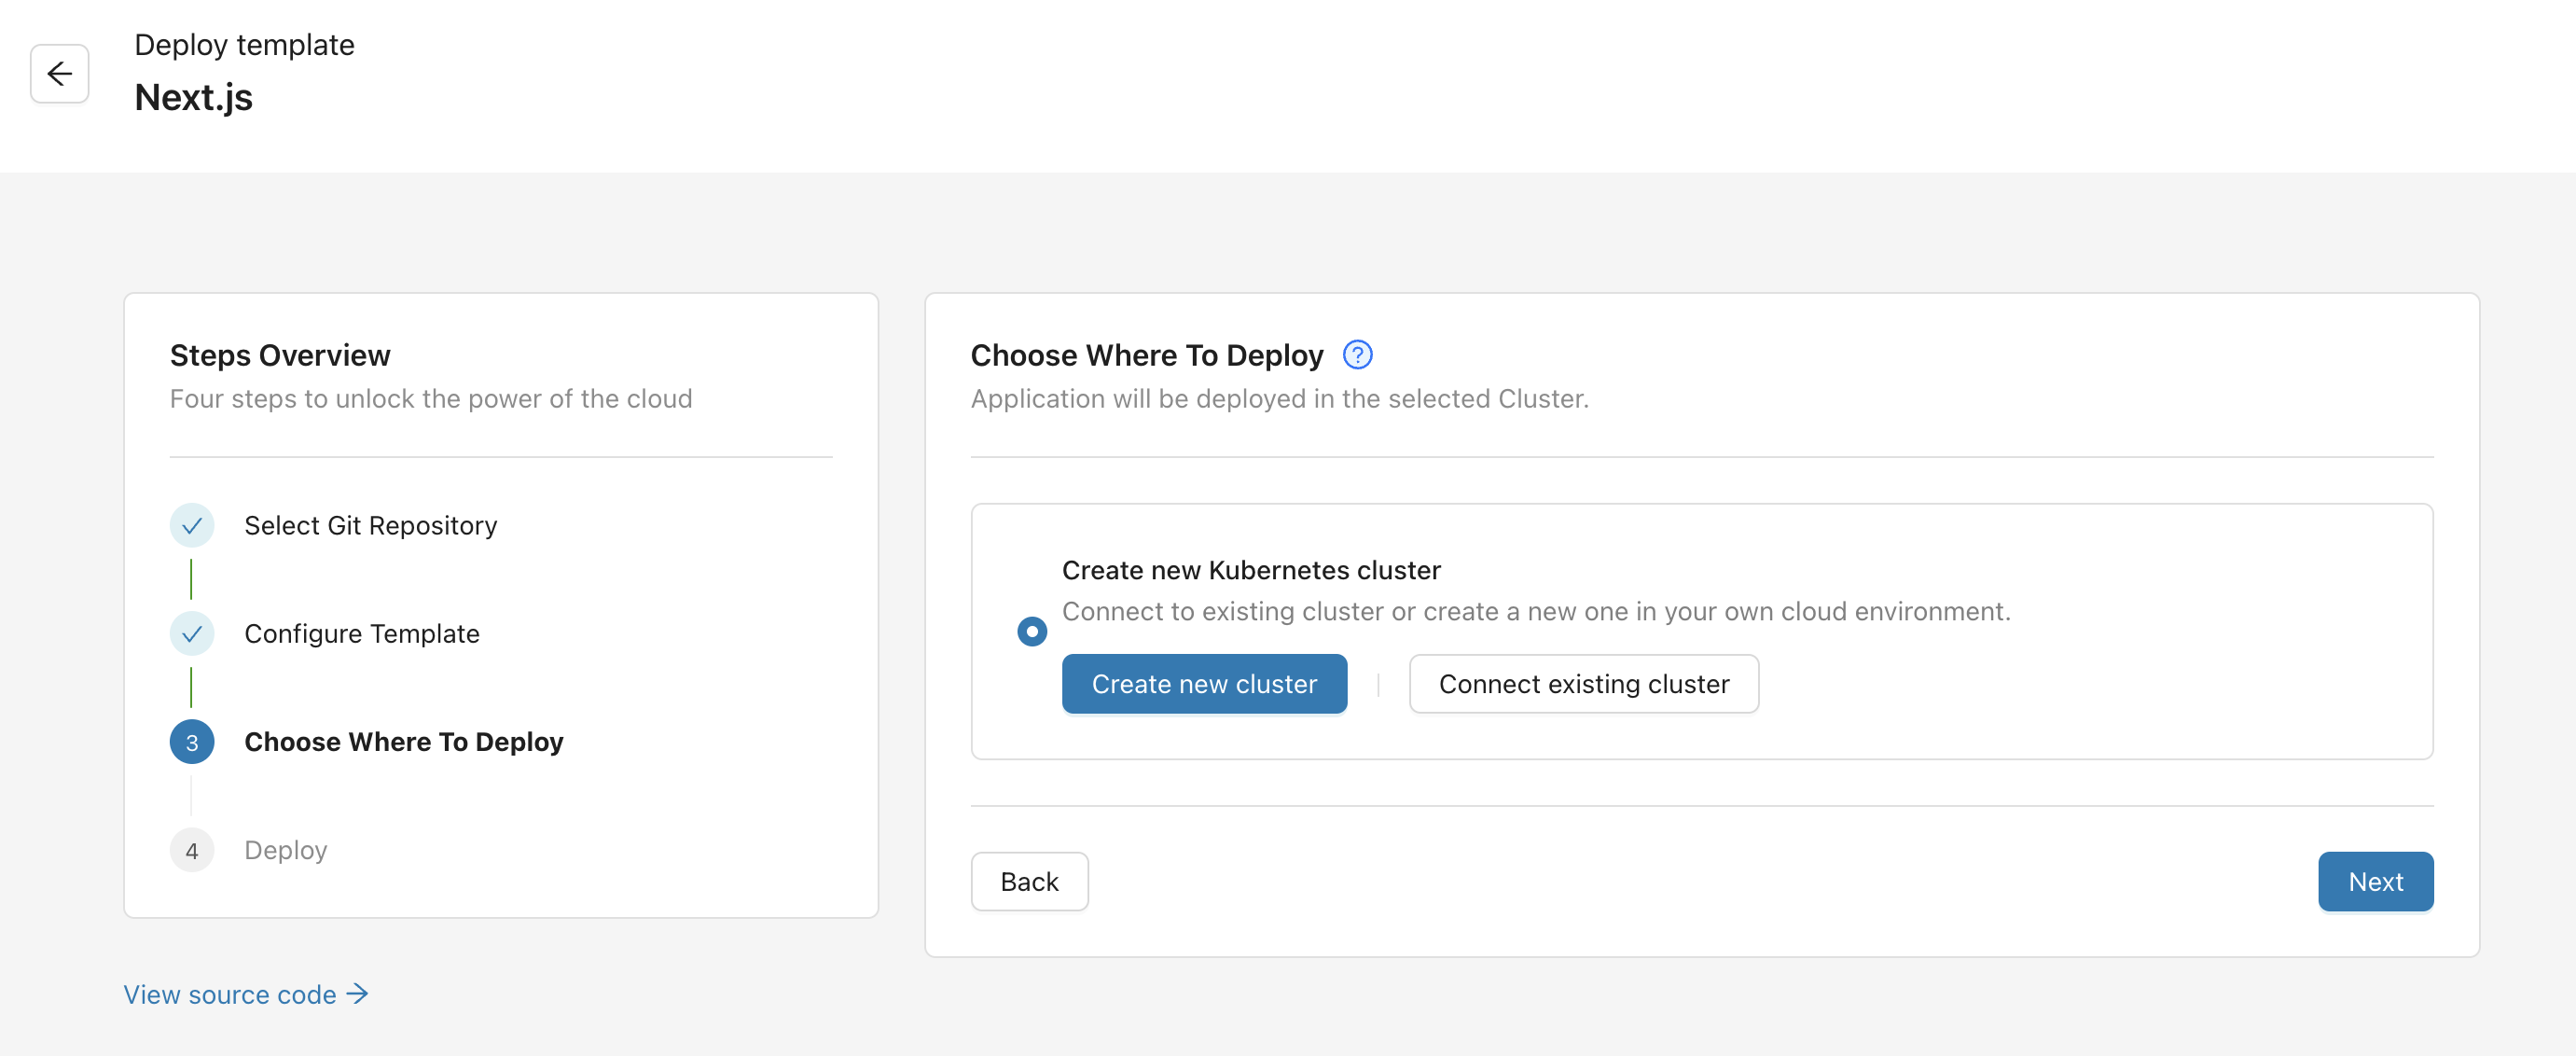
2. Select a cluster
Choose your deployment environment. Create a new Amazon EKS cluster or connect an existing Kubernetes cluster. This step sets up the infrastructure your application runs on.
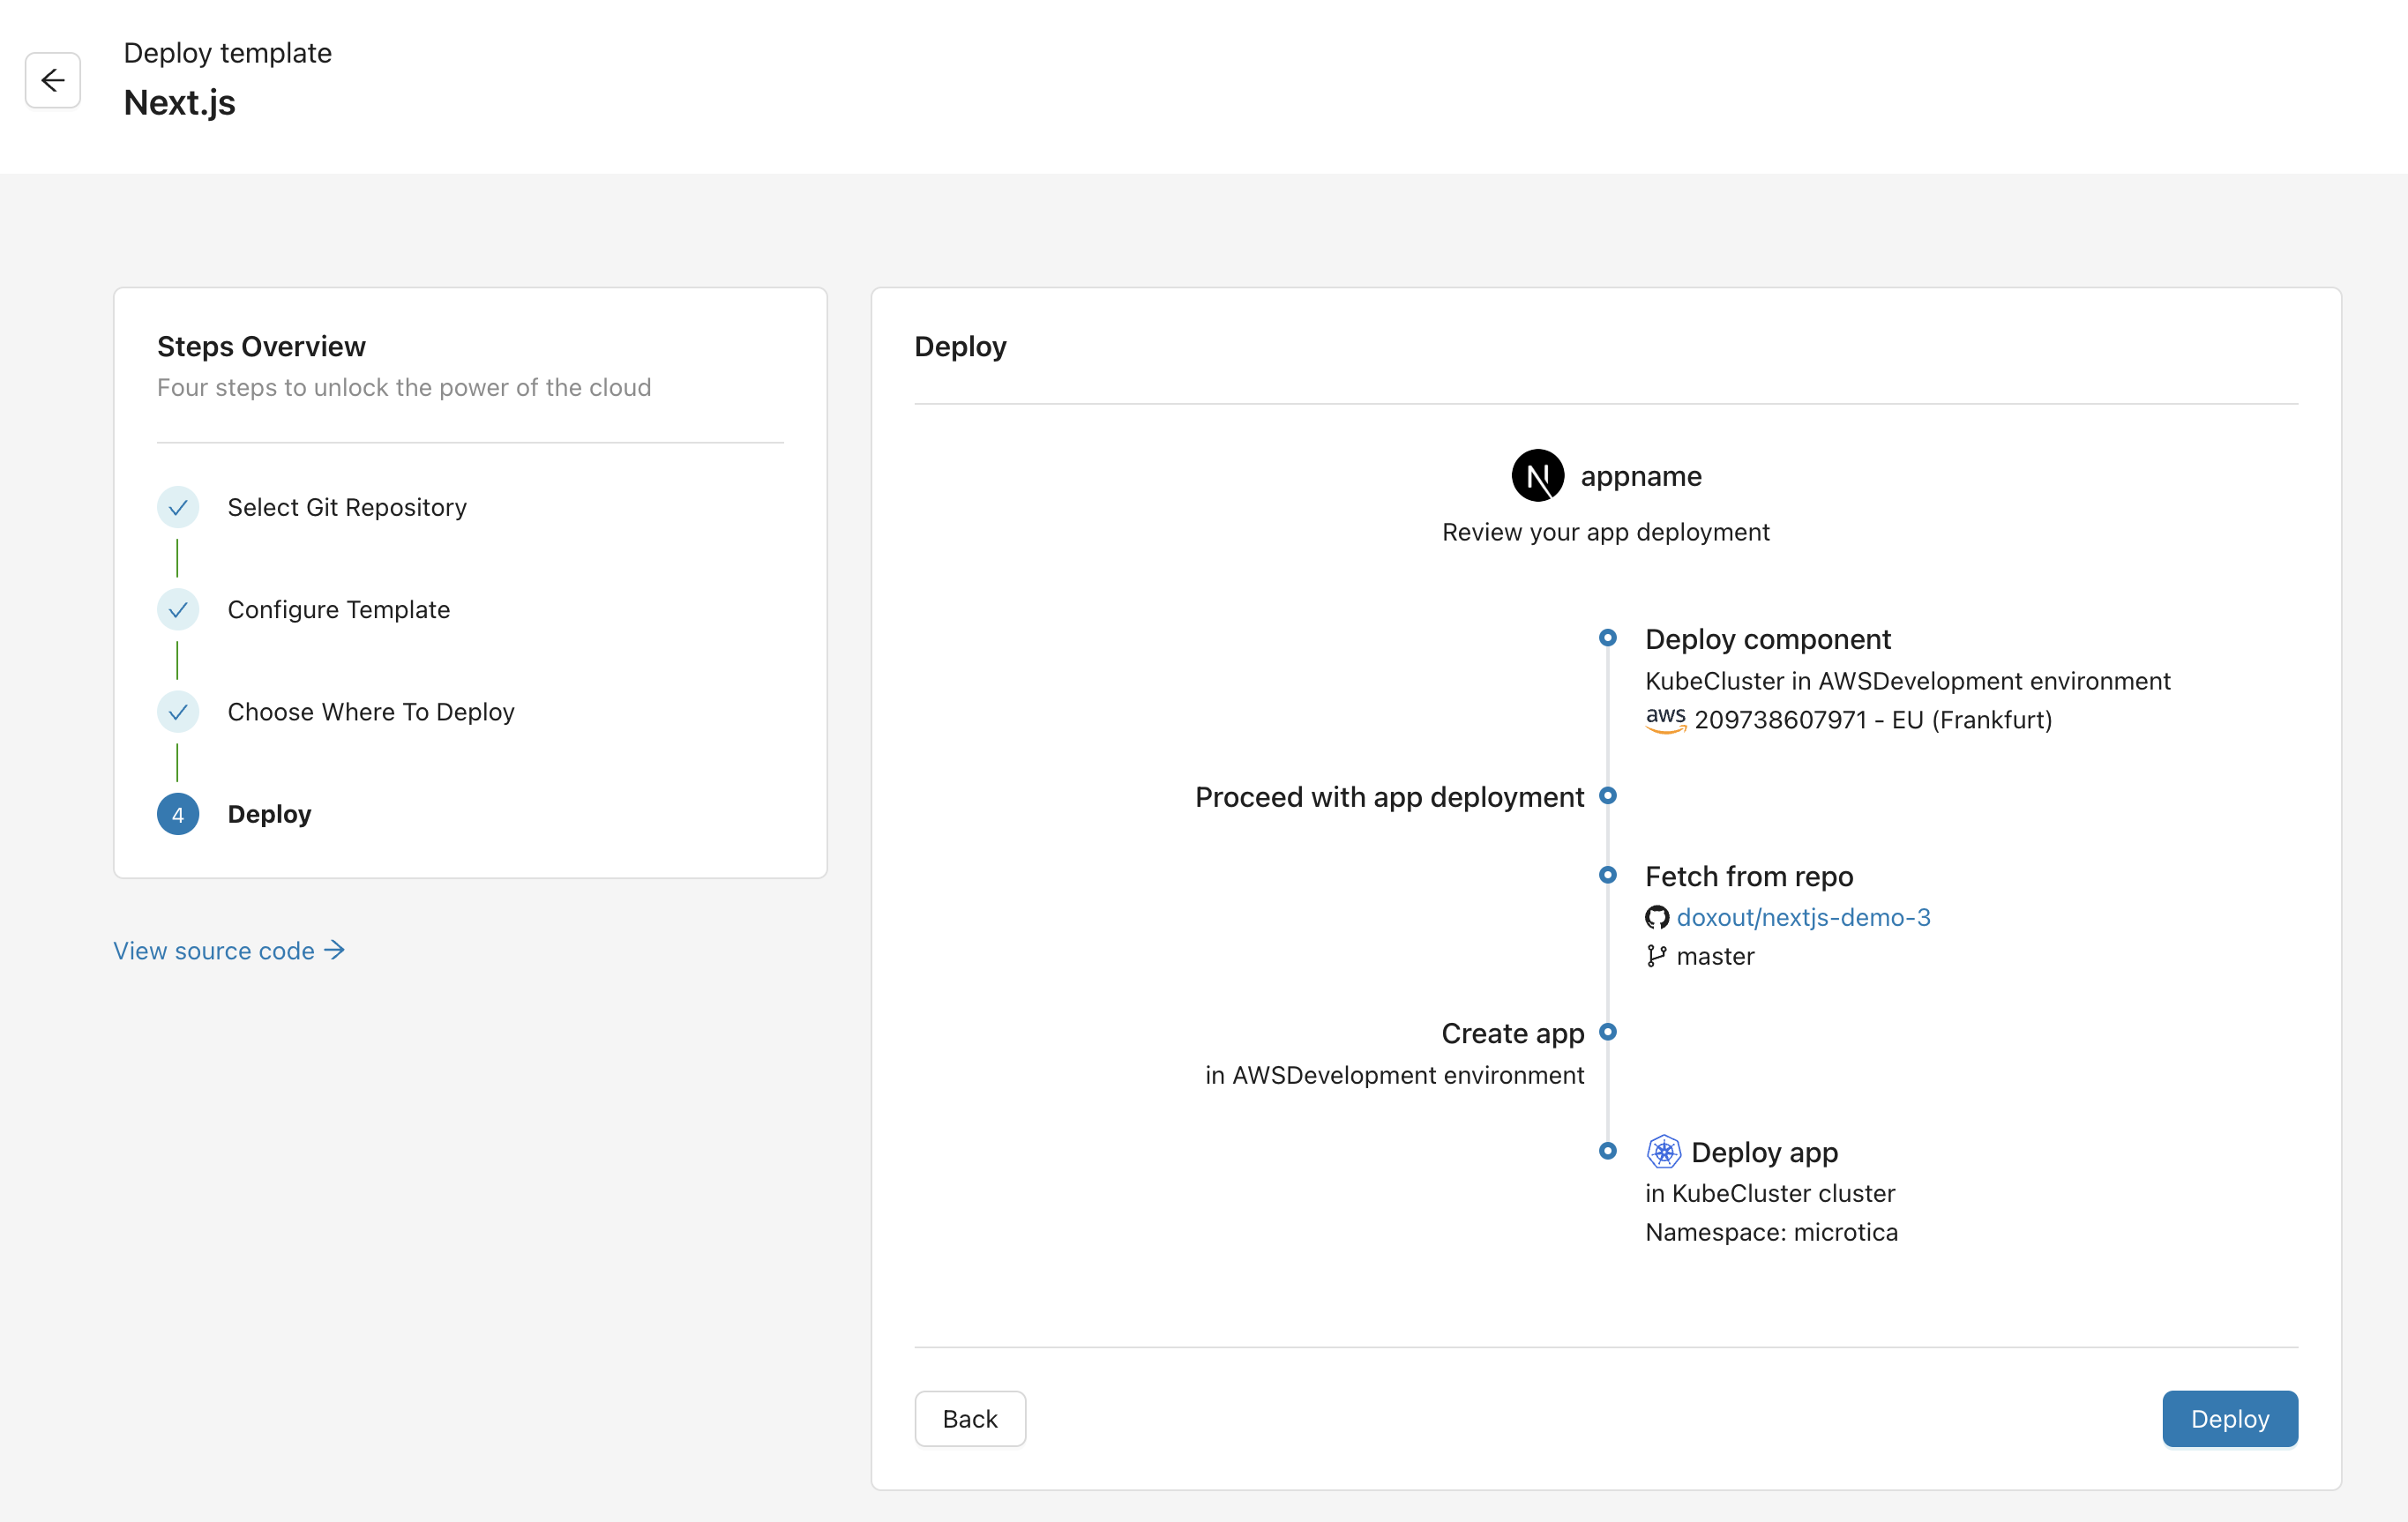
3. Deploy your application
Review the setup and start the deployment. Microtica handles the deployment and streams real-time logs so you can follow progress. When it finishes, you access and manage your application from the Microtica Console.

Assign a custom domain
To make your application accessible from the internet, assign a custom domain from the app settings:
- Go to the Environment where your app is deployed.
- Select your App.
- Click the Settings button.
- Open the Domain tab.
From there, configure your custom domain and make your application publicly accessible.
For full instructions, see Assign a custom domain.
Next steps
How Microtica works
Microtica connects to your own cloud account and adds templates, pipelines, and monitoring on top, so you provision infrastructure and deploy apps faster.
Migrate to Microtica
Move your applications to AWS with Microtica. Create a new EKS cluster, connect an existing one, or import your app straight from a ready-to-use template.