EKS administration
Set up local kubectl access to your EKS cluster, shell into pods, port-forward applications, and grant your apps access to AWS resources like SES and SQS.
Once your EKS cluster is running, you can manage it from your own machine. View cluster resources in the AWS Console, configure local kubectl access, shell into pods, port-forward applications, and grant your apps access to other AWS resources.
View EKS resources from the AWS Console
To view EKS resources directly from the AWS Console:
-
In the Microtica console, choose the Kubernetes resource and copy the EKSConsoleRoleName output parameter value.
-
In the AWS Console header menu, choose Switch role.
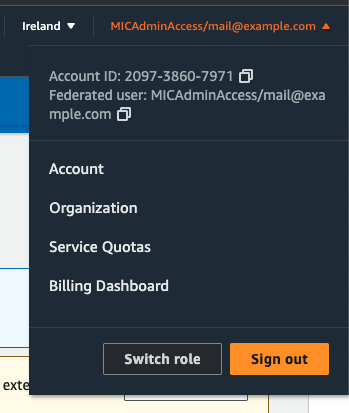
-
Enter your Account ID, the Role name you copied from the Microtica console, and choose a Display Name for the role.

-
You're redirected to the AWS Console. Navigate to EKS, choose a cluster, and view all resources for the cluster directly in the AWS Console.
Set up local access to your Kubernetes cluster
To access the Kubernetes cluster, first obtain the credentials from the AWS Console.
- Go to the AWS Console and navigate to AWS Secrets Manager.
- Under "Secret Value," click "Retrieve Secret Value" to access the Kubernetes credentials.
Next, configure a new cluster using the kubectl utility:
- Open your terminal or command prompt.
- Make sure the kubectl utility is installed and configured to access your cluster.
- Use the following commands as a template, replacing the placeholder values with your actual secret information:
export CLUSTER_NAME="<name of the cluster>" && \
export ENDPOINT="<endpoint>" && \
export API_TOKEN="<apiToken>"kubectl config set-cluster $CLUSTER_NAME --server=$ENDPOINT --insecure-skip-tls-verify=true && \
kubectl config set-credentials $CLUSTER_NAME --token=$API_TOKEN && \
kubectl config set-context $CLUSTER_NAME --cluster=$CLUSTER_NAME --user=$CLUSTER_NAME && \
kubectl config use-context $CLUSTER_NAMEShell into a running container
To log in to a specific pod deployed in the Kubernetes cluster, run these commands in your terminal:
# List all pods in 'microtica' namespace. Replace the namespace if you deployed the service in namespace other then the default 'microtica' namespace.
kubectl get pods -n microtica

# Choose the pod you want to login into
kubectl exec -it <pod name> sh -n microtica
Access applications in a cluster
To interact with an application running inside a Kubernetes cluster from your local environment, run these commands in your terminal:
# List all pods in 'microtica' namespace. Replace the namespace if you deployed the service in namespace other then the default 'microtica' namespace.
kubectl get pods -n microtica

# Choose the pod you want to access into
kubectl port-forward <pod name> <local port>:<container port>
Grant applications access to AWS resources
By default, the EKS cluster is set up with minimal permissions to AWS resources, prioritizing security.
Often, applications running inside the cluster need access to specific AWS resources such as SES, SQS, SNS, and Cognito to operate.
To extend the default permissions:
- Open the AWS Console.
- Navigate to the IAM service.
- In the IAM dashboard, search for the "NodeInstanceRole" role linked to your EKS cluster.
- In the role details, open the "Add Permissions" dropdown menu.
- From the dropdown, choose "Attach Policies".
- Browse and choose the policy that grants the permissions your apps need for the AWS resources.
- After selecting the policy, click "Add permissions" to apply the changes.
This grants your applications the access they need to AWS resources while keeping your EKS cluster secure.


Next steps
Amazon EKS
Create a managed Kubernetes (EKS) cluster on your own AWS account with Microtica's production-ready template, configured and deployed in about 10 minutes.
SPA on CloudFront
Deploy a single-page application on Amazon CloudFront with Microtica, backed by an S3 origin, a custom SSL certificate, and automated Git deployments.