Assign a custom domain to a component
Assign a custom domain to a Microtica component from the Component Outputs section, with the SSL certificate and CNAME records handled for you.
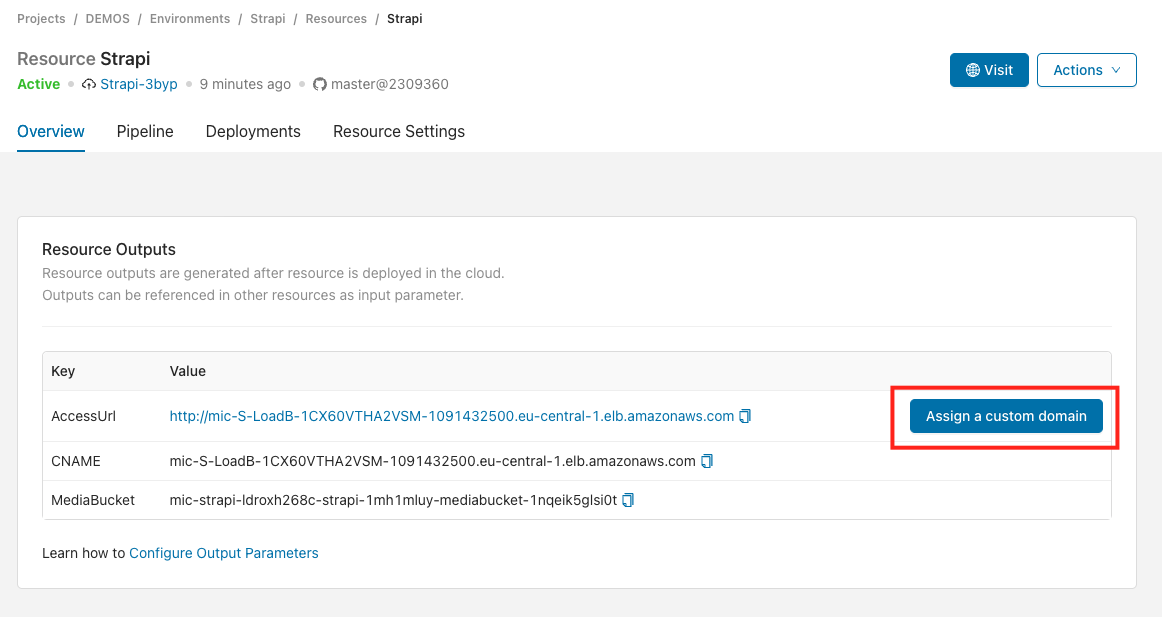
To assign a custom domain to a component, select the component from your environment and click Assign a custom domain in the Component Outputs section.
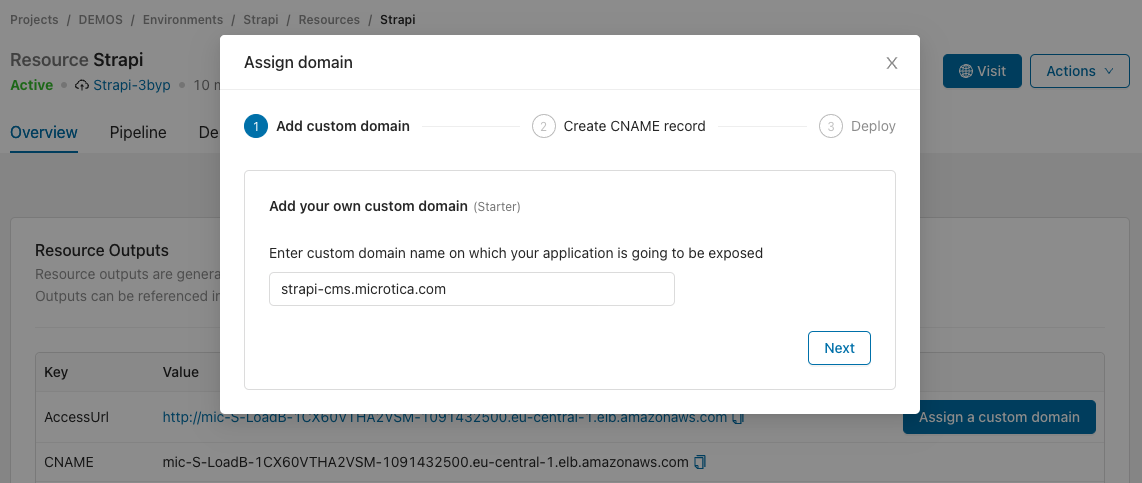
Enter your custom domain name and click Next.
Generating a new SSL certificate can take a few moments.
Once the SSL certificate is ready, you get a pair of CNAME records to add at your DNS provider.
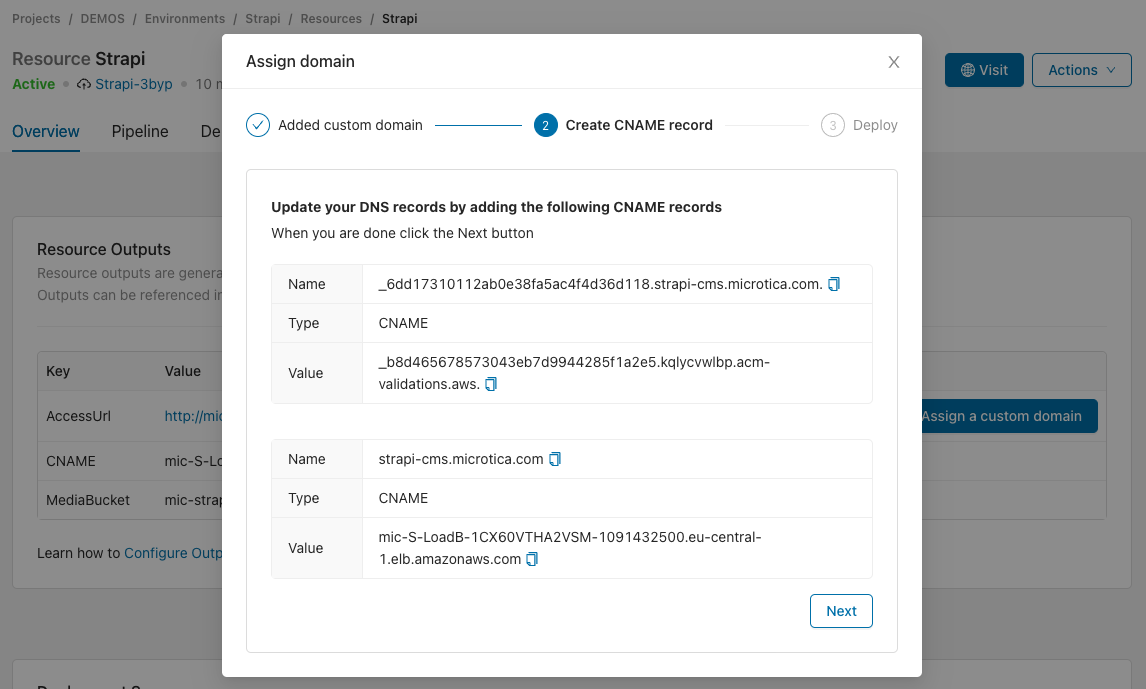
This example uses GoDaddy as the domain provider, but the process is similar for other providers.

Once you add the CNAME records at your domain provider, click Next. Wait until DNS propagation completes. This could take a few minutes.
In the next step, Deploy your component for the changes to take effect.
Your component should be accessible on your custom domain once the deployment completes. 🎉
Next steps
Terraform
Define cloud-agnostic infrastructure in Microtica with Terraform components, using the microtica.yaml, main.tf, outputs.tf, and variables.tf files.
Pipelines
Automate your software delivery in Microtica with pipelines that run each step in its own Docker container, so you can mix frameworks and tools in one flow.