Deploy from multiple Git branches
Run separate deployment pipelines for different Git branches so you can ship development, testing, and production to their own cloud environments in parallel.
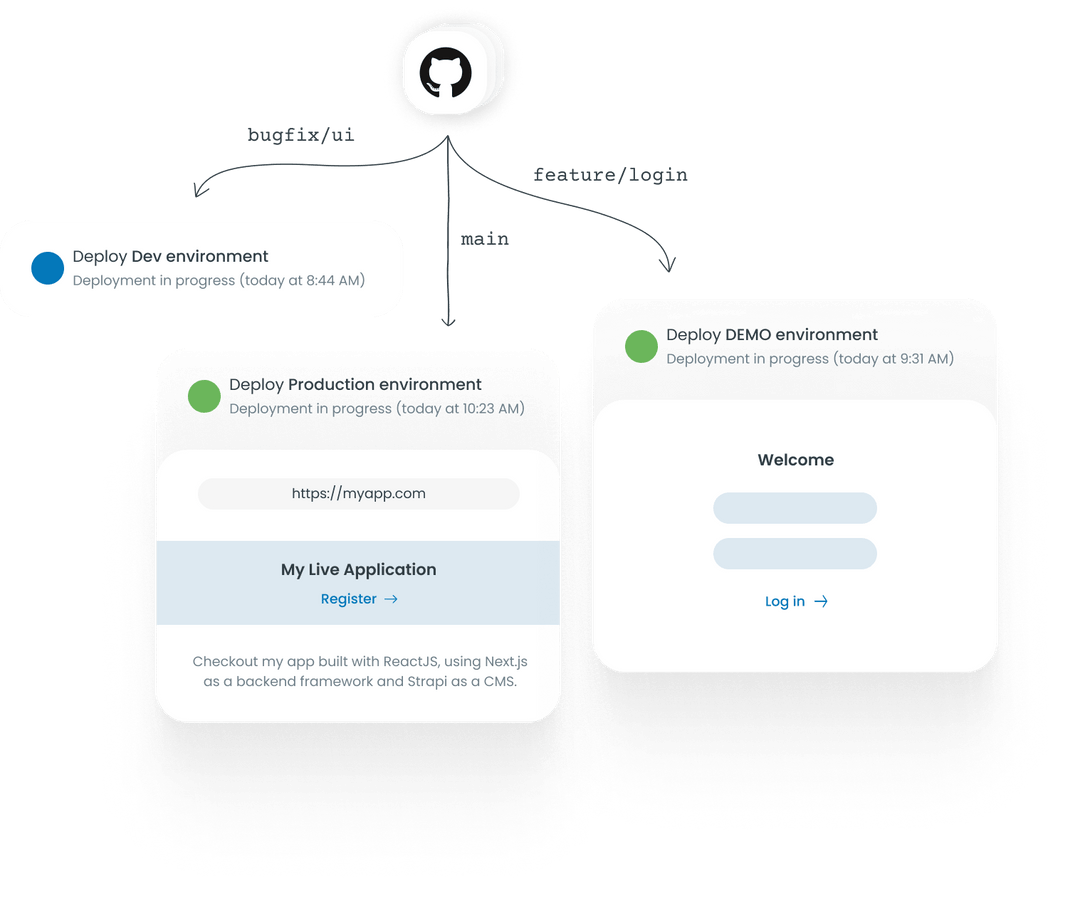
Microtica deploys from multiple Git branches to different cloud environments, each with its own pipeline. This lets you run development and testing workflows in parallel: you choose the environments from the console and set which branch triggers each automated deployment.
When you sign up to Microtica, a development environment is created by default. For a reliable software development lifecycle, set up separate environments for development, testing, and production. Separate environments keep the process controlled, reduce risk, and let you validate changes before they reach users.
You create additional environments from the ready-made templates. This guide walks through creating a testing environment with the Import template and deploying from a testing branch.
Prerequisites
- A Microtica account with permission to create environments.
- A repository with your application code.
- A testing branch (for example,
test) in your Git repository.
Create a testing environment
Follow these steps to create a testing environment with the Import app template and deploy from your testing branch:
-
Log in to Microtica and open the Microtica portal.
-
(Optional) Open the Environments section in the project and click Create Environment.
-
Click Deploy app in the header.
-
Select the Import existing app template from the available options.
-
In the first section, choose the Git repository where your code is located.
-
Under Branch, enter the testing branch you want to use (for example,
test). -
Click Next to import the repository and branch.
-
Configure any environment variables your testing setup needs.
-
Click Next to save the environment configuration.
-
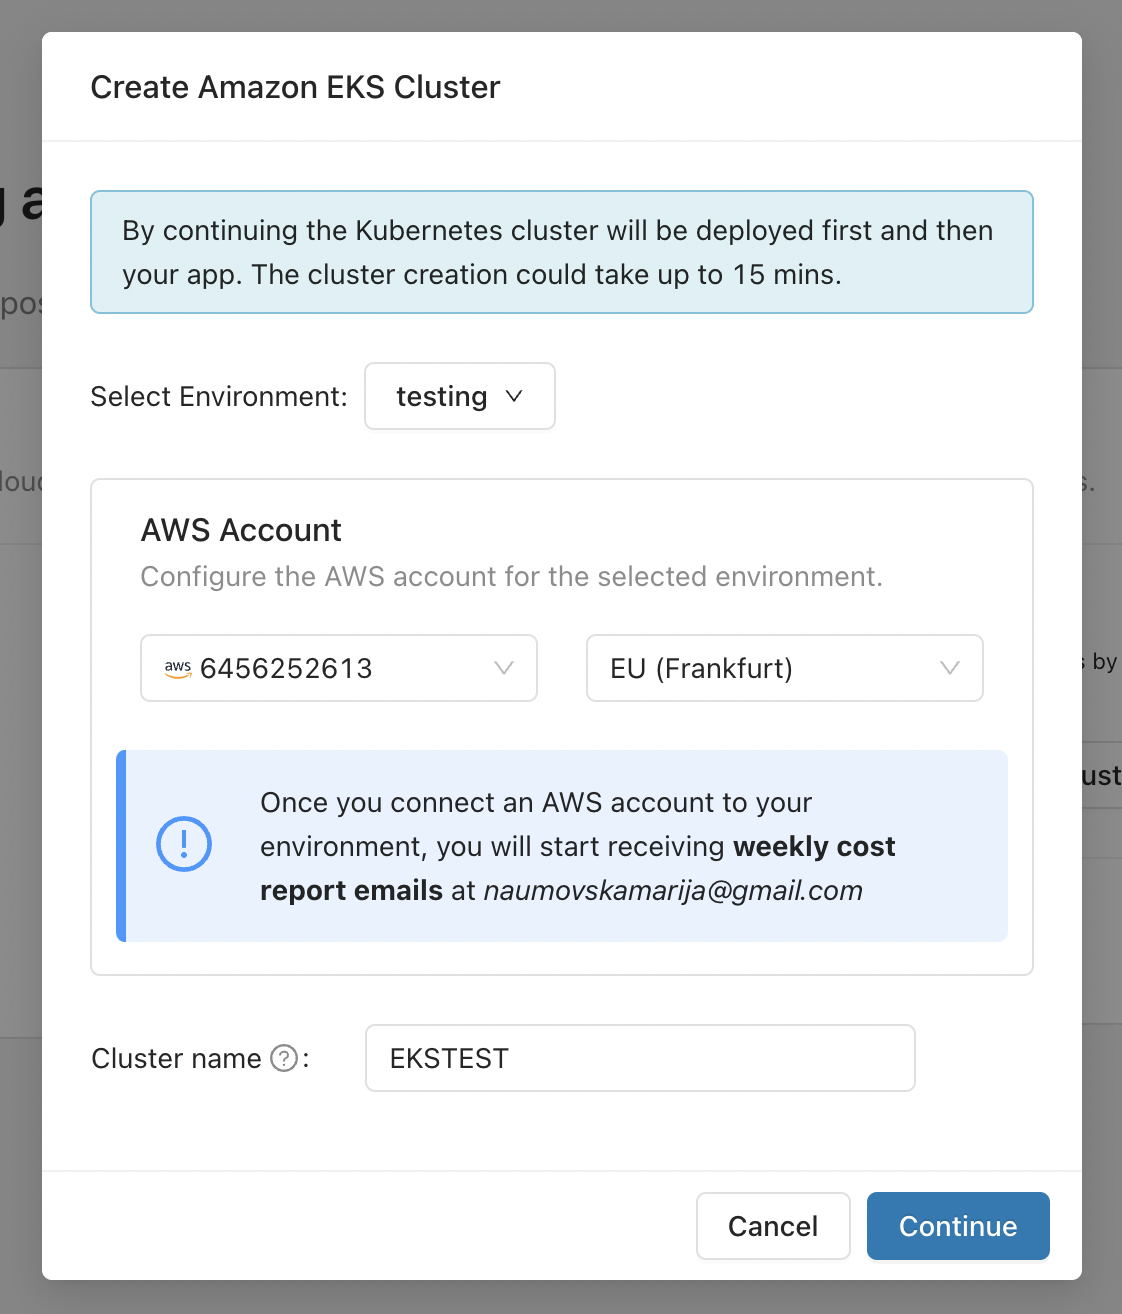
In the Choose where to deploy section, click Create Amazon EKS Cluster. In the popup, select the environment to create the EKS cluster in and deploy the app. Select the environment from step 2 if you created one, or create a new environment now.
-
Enter the details for your new testing environment, such as name and description, then click Create.
-
Add your AWS account credentials for the environment, specify the cluster name, and click Continue.
-
Review your selection and start the deployment. Your new testing environment is created and deploys from your testing Git branch.

Deploys on every push. Microtica automatically deploys the code from your testing branch to the new environment on every git push.
This setup lets you test and validate your application in a dedicated environment while keeping a separate branch for testing.
Video guide
Watch a scenario that deploys automatically from the master branch and another feature branch.
Deploying from multiple Git branches lets you run development and testing workflows in parallel, each shipping to its own cloud environment. Following the steps above, you can configure several pipelines, tie each to a specific branch, and automate delivery for every branch independently.
Next steps
Set up automated deployments
Deploy automatically on every commit or tag. Connect a Git repository to a cloud environment and let Microtica run your CI/CD pipeline on each push.
Pipeline notifications
Stay on top of your CI/CD pipelines with real-time status updates. Get alerts in Slack and the Notification Center when a pipeline starts, finishes, or fails.